Wednesday 5 December 2012

Other students work

 Whilst on the OCA website this article caught my eye

http://oca-student.com/sites/default/files/Emmaus_PDF_low-res.pdf

Wow, I think this is a truely meaningful piece of work and gives great encouragement to others.  This piece of work has been show cased well and lets people know that there is hope, and places to receive help. Well done to the student who put this together!

Monday 3 December 2012

DPP Assignment 4 Real or Fake - Resubmission

This post finds me re-submitting an Assignment (which is a kick in teeth as this is the first time that I have had to do this), however you learn by your mistakes and I possibly tried rushing this to complete before Christmas :-(

I have had a good think about this and even though I am not sure that I have still fulfilled the criteria I have redesigned another piece of work for submission.

This time I decided on a wedding theme.  I wanted to have the Bride and Groom on a beach location and after some internet research I discovered a wedding magazine called " Destination Weddings and Honeymoons" so I decided to recreate a cover.


A screenshot of various layers, I also added a white boarder as I felt it would help make the couple stand out a little from the background.  I positioned the couple close to the edge so that the dress took up the bottom left corner and I started adding text.
 
 
Playing with the title layout and font styles before deciding on the final layout
 
 
The final magazine cover for Assignment 4 Real or Fake


Assessment results - The Art of Photography

Assessment results - The Art of Photography

I have just had an email advising me of my pass mark for The Art of Photography and I passed - YEAH!!!  Just got to knuckle down and stay there!

DPP - Tutor Feedback - Assignment 4

DPP - Tutor Feedback - Assignment 4

Well here are the tutor's comments for assignment 4.  It would appear that I was slightly off the track with this one and have not followed the brief with regards to the real or fake element.  I miss read this and choose the fake element rather than the middle ground that I should have decided on being the ethical believability of the image.
 
I have looked at several other pieces of work from other students that previously completed DPP 4, and I am not sure that I actually understand where I went so wrong with this.  I actually believe that some went the same route as myself and some having used almost cartoon imagery to create their book/magazine cover.
 
CLICK THE LINK TO VIEW

https://docs.google.com/file/d/0B-TICHIX137FTUJBd3BrMmRCZ2s/edit

Wednesday 21 November 2012

DPP Assignment 4 Real or Fake

DPP Assignment 4 Real or Fake

The Brief: To produce a photographic image to illustrate an imaginary book or magazine cover.  Decide on a topic to be illustrated, you could use an existing book and devise an alternative cover that will get the theme or story across to prospective readers.
 
Although advertising is all around us, every where we look there is some form of it, I found this assignment relatively difficult in terms of thinking of a topic, researching it, the content, the style and the layout.  All things that need to be considered.
 
 
50 years of advertising, I have a copy of this magazine that shows 50 front pages of magazines dating back to the 1960s to the present day, an interesting research tool.
 
It took awhile to think of a topic, and I almost had a mental block in relation to it, however once I thought of a topic, the ideas started flowing, I had to scribble the ideas down.
 
The idea came from my husband who is studying for a degree in Viticulture and Oenology and the house is littered with wine books and magazines, hence the theme/topic of a wine book cover/magazine.
 
 
Scribbled notes of ideas and layouts, titles etc
 
Well this assignment started out to be a book cover, but has since changed to a magazine cover as I felt it had more scope.
 
I started out by setting up a mini studio with white backdrop and one studio light, a wine bottle, glass and carafe.  I took several compositions, uploaded these to my computer and worked on from there.  I did a second shoot as I wanted to enhance further some of the previous images that I had taken.  These were specifically for the cover.
 
I used a clear wine bottle, water and food colouring to create this look.
 
 
Original image shot using a small studio set up with basic lighting, once uploaded and a few clean ups made and converted the image then looked like this.
 
 
I love the fiery effect in the glass and had already thought of a caption "Wine - The burning issues"
 
After looking at several magazine of hubby's  I decided on a classic black and white theme which would surely show off the stunning orange fire in the glass/bottle.
 
I enjoyed putting this cover together, I found it very satisfying to see the completed cover.  I plucked the Decanter title and also the bar code from the internet to finish of the cover, but all other work was created by myself.


I wanted to keep it as clean and simple as possible, but yet being as creative as I thought possible with the almost fire like look in the glass, I love the simple layout and the striking fiery orange colours that the glass and bottle shows.


Monday 19 November 2012

DPP 4 - Exercise - Alteration

DPP 4 - Exercise - Alteration

The brief:  To remove a part of an image that is not required and to replace it with parts of an image that are contained in the image.

 
A bride with the groom in the background making the image look unsightly, as he was not supposed to be there.

 
Again this was something that I had never done before and was keen to give it a go, Im not entirely sure that I have done a perfect job, I suppose something like this comes with experience and practice.

DPP 4 - Exercise - Addition

DPP 4 - Exercise - Addition

The brief:  Adding one element of an image to another image.
 
After alot of messy about and trying to master this exercise, I realised that I was not on the correct layer hence my struggling with not being able to get the sky to show through.  At last I have managed to do it.  This is something that I had not done before, so I had a look at a view youtube videos before I started.


Original image of Corbierre Lighthouse, Jersey with a really washed out sky line.
 
 
Copy and pasted a new skyline using layers, I choose a fairly cloudy sky as it was originally an overcast day and the main image is in shadow.  Even though it is a cloudy sky with a little blue areas I think it has increased the viewing of the image.
 
 
Here is another image that I tried this exercise on, just to run through the process again.  The original image of Corbierre Lighthouse.
 
 
The addition of a new skyline and alteration of contrast and brightness sliders


Friday 16 November 2012

DPP 4 - Exercise - Enhancement

DPP 4 - Exercise - Enhancement

Brief: Photograph a closeup, head and shoulder portrait in available or natural light, without flash or other photographic lighting.  The face should be in the shade, facing torward the camera and both eyes clearly visable.
 
I used my daughter for this exercise, we went outside to the back garden, against the wall is completely shaded and no other lighting was used.
 
 
Original image with natural lighting taken in the shade

 
The face and neck was selected using the quick selection tool and then the brightness and contrast slider adjusted


I changed the colour here to a dark green, but it is hard to see here and almost hides the pupils too, so not a good enhancement


Here I brightened the colour of her natural brown eyes and cropped in tighter.
 
 
On this last image we had to alter the eye colour by adjusting the hue slider.  I also noticed whilst doing this that the catch lights in the eyes changed colour, as there is slight sky light caught in them.
 
I am satisfied that making selections to enhance and brighten are positively feasable, however by changing the colour of a persons natural colour of eye is tampering with reality and not ideal.
 
Whilst flicking through an old photography magazine I found this article on enhancement.  Some of these enhancements are beyond are a little too much in my eyes, ok they have tidied up her hair, however they have also cosmetically modified the shape of her face!!!


DPP 4 - Exercise - Improvement or Interpretation

DPP 4 - Exercise - Improvement or Interpretation

I photographed my husband just sitting casually in the lounge, mid afternoon for the purpose of this exercise.


A close up of his blue eyes
 
 
A slight blue colour enhancement
 
 
Too much colour change for me as I know this is not the true colour of my husband eyes, however to the general viewer a completely different opinion is to be reached. I do not believe that this improvement has over stepped the mark as it could be justified as eye brightening.
 
 
Completely over enhanced and not a natural look - this has definately over stepped the mark of improvement and interpretation, but as this was an experiment I think that it is justified to include it.


Monday 12 November 2012

DPP 4 - Exercise - Correction

DPP 4 - Exercise - Correction

After spending sometime trying to find the images in the key resources section of the student website, I finally found them under DPP Exercise 19 (this is not stated in the module notes and perhaps this could be added to make it clear for future students - it would appear in the forums that I am not the only one that took time or was unable to locate this)!

Original image for dust

 
I magnified this image to 100% to try and identify various dust spots.  I found this rather tricky due to the abstract nature of the image, however, I think I have identified several spots which have been highlighted for removal.
 
 
Here I have circled where I believe dusts spots to be within the image and saved the image for reference.
 
 
A cleaned up version of the original image.  I have cleaned this image from dust and believe that it looks better, the rest I believe to be artifacts within the image itself, so therefore didnt remove to much as I did not want to detract from the image.
 
I think this is a natural part of post production to show the image at its best and do not believe this to be intervening or unethical as it does not change the nature of the image.


Original image for lens flare


Magnfied too 100% and flare identified on the left side of the image
 
A screen shot of the removal process - not as easy as initial thought!
 
Disappearing slowing - I found this exercise a little difficult as this is something that I have never done before.  We all add flare now and again to images to give different effects and finishes, however I have never had to remove it.


How justifiable was this exercise?
I believe that it would be ok to remove flare from an image after all we are not altering the ethical nature of the image.  If it were an image that I had taken, I would have tried to capture it without flare, ensure a lens hood was fitted or perhaps trying a different composition of the image.  Justifiable is a word that holds strong morals, but as we are not altering the morals of the image I firmly believe that it would not offend anyone by the flare being removed.


DPP 4 Real or Fake? Interesting Reading ...

DPP 4 Real or Fake makes interesting reading ...
 
I thought that I would reseach this module as I always do, I found some interesting reading was dates back to the early 1900s when photography was still relatively new.

Trotski and Stalin
 
By doing a google search on "falsification of photography" The first and most commonly found on the internet is that of Stalin and Trotsky.
 
Falsification of History of Communist Russia
 
 
Here Trotsky can be seen with Lenin, however in the following image he has been removed.  This image is now of a very dark grainy contrasted nature and shows a large gap where Trotsky once stood. 

 
Unwanted people in these photographs were called 'enemies of the people' they were not killed, but simply removed from the image.  There are several images like this and this is a definate attempt at changing History.  That being should the original image not exist then obviously we would believe the falsification to be a genuine image and be none the wiser.

I think this is a very sad attempt and distortion of history and has great consequences to the modern day.
 
[Online] at: http://www.tc.umn.edu/~hick0088/classes/csci_2101/false.html accessed on 12/11/2012


Brian Walski
A professional photographer who was accused of altering an image in 2003 for the news papers.  He later admitted this to be the case.

Iraq Scandal
On March 30, 2003 Brian Walski took photographs near Basra, Iraq of British soldiers telling Iraqi civilians during the 2003 Invasion of Iraq to take cover. He took a number of pictures and while later viewing them decided to combine a couple of his images to create a superior picture. That day he sent the pictures to LA staff who posted them on the internal photo sharing system for various media outlets owned by the Tribune News Corporation. Media across the country ran the image including Walski's LA Times and the Tribune Corp owned, Hartford Courant. It was at the Courant that the image was noticed.  McGuire confirmed that the image was altered and contacted Colin Crawford, Los Angeles Times Director of Photography.  It took Crawford four days to get hold of Walski who was still in battle conditions covering the war. When confronted with the image Crawford said, "Give me an excuse. Tell me it was a satellite transmission problem. Say something." to which Walski replied, "No, I did it. I combined the two pictures.

[Onling] at http://en.wikipedia.org/wiki/Brian_Walski [accessed on 12/11/2012]

Here are the 2 images that where altered to one.


The following image is the altered image showing great moral and unethical implications to viewers.  This was seen as a hugh disgrace and Walski was sacked.  I think Walski deserved to be sacked over this, as many different viewers of this image will take different views.  The War in Iraq is bad enough without falsification of images this could have had a detrimental effect on the whole situation.
 

[online images] http://www.sree.net/teaching/lateditors.html [accessed on 12/11/2012]

Jose Luis Rodriquez

This is a different story altogether, the actual image is 100% real, however it was a set up scene using a trained animal and not that of a wild animal as portrayed in the image which then went on to win a competition.


[online image] http://www.guardian.co.uk/artanddesign/jonathanjonesblog/2010/jan/21/wolf-photographer-wildlife [accessed on 12/11/2012]

José Luis Rodriguez, was stripped of his £10,000 reward, the judges didnt believe that the wolf was a wild animal. They believe that he hired a tame animal in for the shot, however Rodriguez denies this be the case.

Suggested reading from Tutor...

Jeff Wall
Staged and scenario driven images


Another interesting site which is very controversial in terms of the images that have been recorded.

http://www.fourandsix.com/photo-tampering-history/


DPP - Tutor Feedback - Assignment 3

DPP - Tutor Feedback - Assignment 3

Another quick turn around from my Tutor Russell, with lovely feedback and pointers.


PLEASE CLICK ON THE LINK TO VIEW

https://docs.google.com/file/d/0B-TICHIX137FcXU4MkE3cFdmRW8/edit

Thursday 8 November 2012

DPP Assignment 3 - Monochrome

DPP Assignment 3 - Monochrome

The brief:

Choose a theme or subject that you will conceive, shoot and process in black and white, attempting to bring our the monochrome images qualities of form, tonal contrast and texture, perhaps even experimenting with key.  You should choose between 5 and 10 images.
 
Subjects to consider: People, Landscapes, seascapes, trees and plants, skin ie: old and young, architecture, urban, musical instruments.

Current thoughts are People, skin (old and young) and also possibly musical instruments!  Watch this space ...

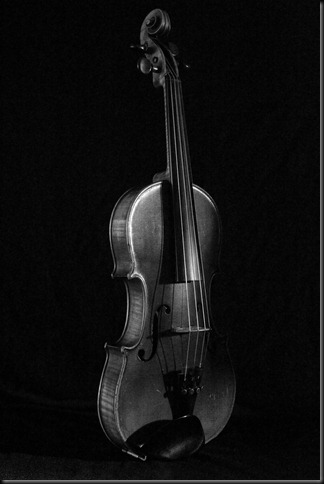
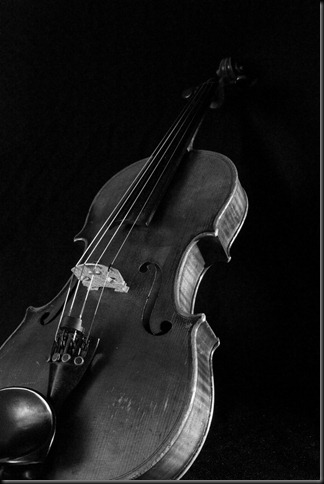
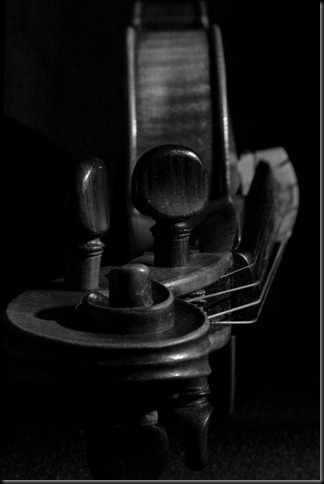
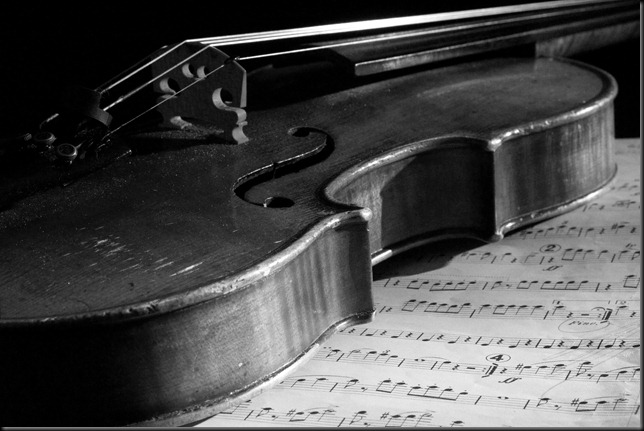
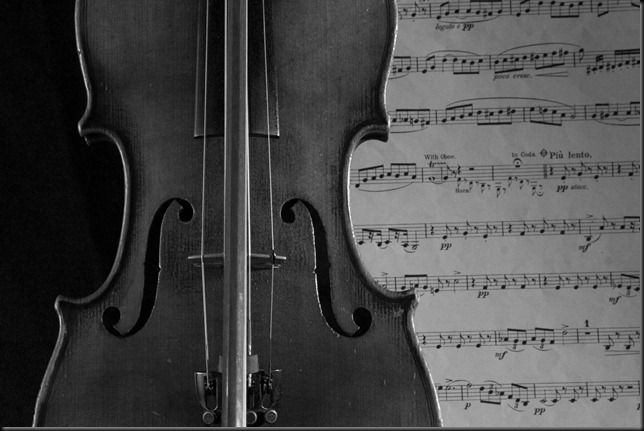
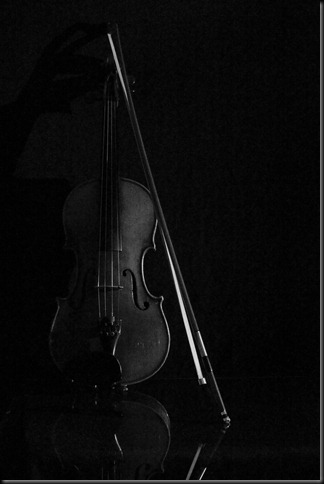
Ok so out came the old violin, black back drop and one light with barn doors and a reflector and I done some trial shots, after looking at these shots, I decided that I would try and improve on some of them, by means of positioning and lighting.
 
Form
  
DPP3 FORM2
 
Outline shape of a violin showing its 3D appearance
 
DPP3 FORM1
 
Another angle in which the light shows the volume of the violin
 
Tonal Contrast
 
DPP3 TONAL 1
 
Tonal variations from black to white showing different greys on the violin
 
DPP3 TONAL2
 
A close up of the different shades of greys and blacks on the violin
 
Texture
 
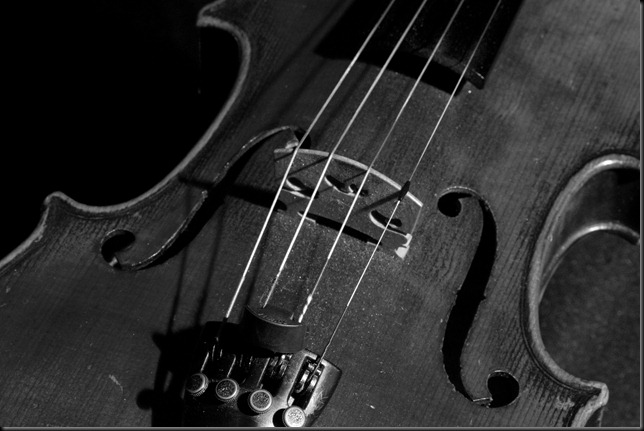
DPP3 TEXTURE1
 
Carvings and strings
 
DPP3 TEXTURE2
 
Old and bashed but still maintains its beauty, these markings help give the violin the rustic charm
 
Key
 
DPP3 KEY1

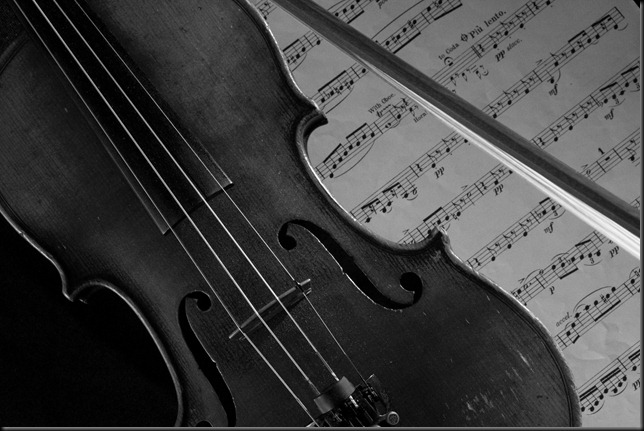
I decided on low key for these shots, however I used some manuscript to enhance and add more white detail
 
DPP3 KEY2
 
Using the black back drop I propped the violin up and lent the bow against it, I also used some glass underneath to create a reflection which I think gives this image a sense on mystery and charm.


My husband was the violin player in the family, and although he does not play anymore, I thought this a great tribute to his time playing the instrument.  I wanted to created some pleasing images using dramatic lighting.  I decided on 1 studio lamp fitted with barn doors as this way I could focus the lighting more on certain areas.  I set up the equipment I needed and had a practise with positioning and lighting and then I previewed the shots that I had taken.  It was late when I finished so decided to pack away and have another go the following day.  During the day I had, had a few ideas also that I wanted to try like the reflection adding manuscript (although not the correct music) it adds to the overall image.  I am pleased with the images that I produced, although another set of eyes and opinions always count.  So look forward to hearing the feedback.
  
 
EDITED:
Advice from my tutor, has lead me to edit a few of the image above and they are as follows:
 
KEY
 
 
Definately works better as a square image

Wednesday 24 October 2012

Other reading and interests

I love this idea - and will definately be considering it the next time I have a tight deadline to meet and the raining is upon us. I love the way the raindrops give that distorted feel to the image, making almost stir harder at it to see what it is your looking at.


screenshot of [online images] access at http://www.lagalerie.de/hatakeyama7.html on 24 October 2012

Friday 19 October 2012

DPP 3 - Exercise: Colours into Tones 2

DPP 3 - Exercise: Colours into Tones 2

The brief:

Make practical use of channel adjustments to achieve a specific effect
  • Landscape
  • Portrait
  • Garden scene


Original image of a young boy at a bonfire party, with a bright halogen light to the left and a bonfire lit to his right.  I liked the innocent look upon his face and they way he was looking directly at me, I think it has a certain atmospheric feel to it.  (This was taken at a friends bonfire party last weekend).  Taken at approximately 7pm it was after sunset with still a reasonable amount of light in the sky.


Desaturated image as per photoshop
 
 
Black and white conversion where the red and yellow sliders were adjusted to the left and the green and blues adjusted to the right.
 
I had a good play with the sliders in this image, back and forth and finally settled on this - they are only slight adjustments but by altering the blue slider to the right this has allowed for the brightening of the right side of the boys face.  Also, by sliding the red and yellow to the left this has brought back some of the blown out highlights on the hair and face area.  I also noticed whilst playing with the sliders the amount of grain that it could produce and as this was a mixed light image with high ISO, I didnt make too many adjustments.
 
Having played around some with other photos, I believe that it is easier to think about the image before you take it and whether it is going to be converted to black and white or left colour, than it is to look for a photo from library to convert as not all images are ideal for black and white conversion.
 
Deliberate image
 
Here is an image that I deliberately went out looking for, it was taken in low light and I didnt like the colours that were produced.  There were alot of reflections in the window of the shop from cars and lights etc.
 
 
Original low light image

 
After converting to black and white, cropping and a little twicking - a much more pleasing to the eye image from a Bridal shop frontage.